I adore the contemporary aesthetic that an unframed canvas with painted edges can provide a space. My canvases are never framed. Normally, I paint the sides of the picture in black or, for commissions, a specific requested colour. Not just because I enjoy the way it looks and not because most galleries require it, but also so that if a future owner decides to frame it, they can select a frame that complements the artwork and their own décor rather than one I chose based on my personal aesthetic.
I add D-rings and hanging wire to the back of the canvas when a painting is finished and varnished so that the owner can take it home and hang it immediately.
Here is the approach I use on installing d-rings and wire for hanging, but it is by no means the only way.
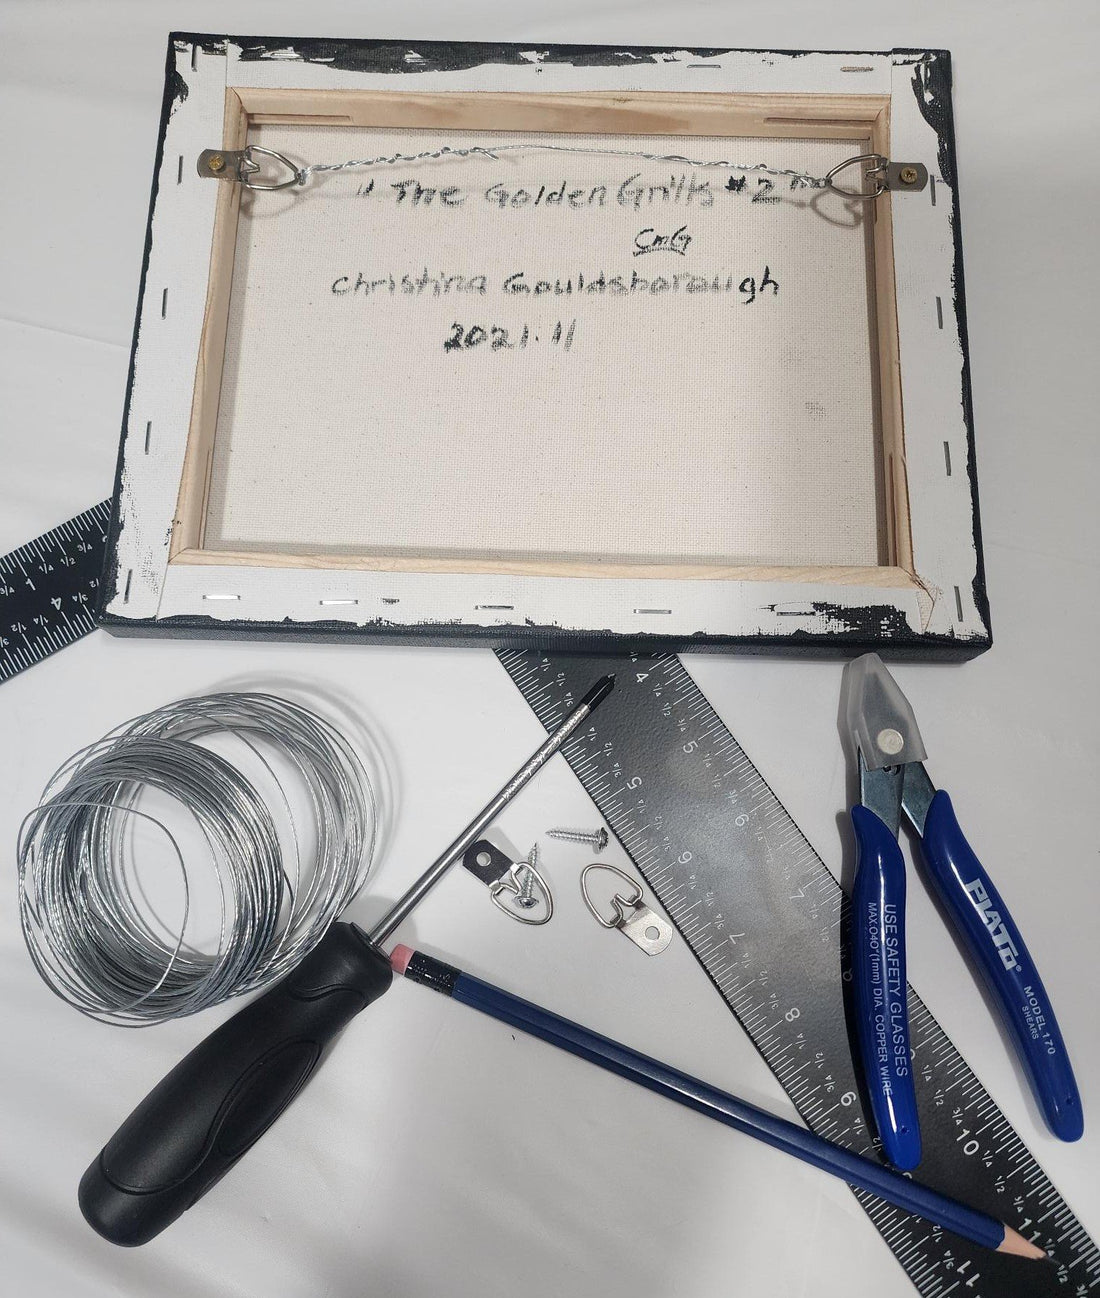
Supplies required:
- Towel or blanket: To prevent my painting's surface from being scratched or otherwise harmed, I always place a towel or soft blanket underneath my work. Before laying your varnished painting out on the towel, make sure it has fully dried.
- a screwdriver - for this project, you will only need a screwdriver to fit the screws for d-rings. In my case it’s a Phillips head to match the screws that came in my kit.
- wire cutters - these can be purchased fairly cheaply from a Dollar Store.
- plastic coated framing wire, wood screws and D-rings - I use a lot of these, so I buy them in bulk, but if you are only doing one framing project, you can find everything you need in a kit. I purchase my D-rings and wire in bulk from Amazon because I wire so frequently.
The D-ring should be placed about 1/3 of the way from the top to lay flat on the wall.
Caution: Once again, before wiring a canvas you must ensure your varnish is completely cured! It’s better to be patient, then have to re-paint. Follow guidelines of your varnish cure time accurately, and honestly, give a bit of extra time for it to set before adding hanging wire, as weather and humidity can change drying times.
1) Place your art face down on the towel or soft blanket and mark the spot where your D-rings will go. The hanging wire should be on the top 1/3rd of the painting. Use a ruler or measuring tape for accuracy!
Take the full length of your canvas and divide by 3. For this example: If I’m wiring a 12” canvas (12” ÷ 3 = 4”). Lay your ruler or measuring tape down on the back of your canvas, from top of canvas (which is face down on your towel) to bottom of frame. Make a mark on the middle of the frame on each side, at your 1/3 way mark from your calculations.
It's crucial to check that your D-rings on both sides are positioned at the same height from the top. Your picture won't hang straight if one is slightly higher or lower than the other.
Notes about D-rings: You will use this hardware to attach the hanging wire. Although some people use other types, most galleries insist on D-rings because they rest flush against the back of the canvas and will swing back slightly as you hang the piece, making it simpler to notice the hook when hanging.
Make sure the screw is not too long so that it will go through the stretcher bar and pop out the front of your artwork, before fastening the D-rings into your canvas frame. Usually, I use a 1.5" profile canvas. Since the screws included in kits are precisely the right length to be secure even on small profile canvases, this problem is avoided.
2) D-rings should be placed over the measurement markings you established in the centre of the frame on either side. Then, using a screwdriver, tighten the screw into the frame so that the loops of the D-rings point inward. Some people pre-screw the holes, but even with low profile frames, I've never had frame splitting or cracking problems. Keep in mind that these screws are rather short.
3) After installing your D-rings, thread the wire through them. Give yourself some extra wire to reinforce the wiring and loosely lay your wire across the canvas to measure. I usually take the entire length and give myself an extra couple inches on either end. Use wire cutters to trim the entire length plus your extra bit.
4): Put the centre of your length of wire in the centre of your canvas by pulling it through the D-rings on either side. Select a side and tighten the wire with one hand. With the other hand, loop the cut end of the wire around the tightened side and pull it through to form a knot. Pull firmly, then repeat on the opposite d-ring. To prevent it from hanging forward from the wall, your wire must be firm and not sagging. If it's loose, you should untie the knot and re-tie it. Don't give up; sometimes it just needs practise.
Step five: Wrap the wire repeatedly a few times starting with the loose end on either side (depending on size of canvas, this is completely up to your preference). Cut any extra wire after wrapping, then repeat on the opposite side. Your completed wiring should resemble this:
If you’re a visual person, and as artists there are many of us. You can watch this great video I’ve found to help guide you.
I hope this was helpful!
Happy framing!

